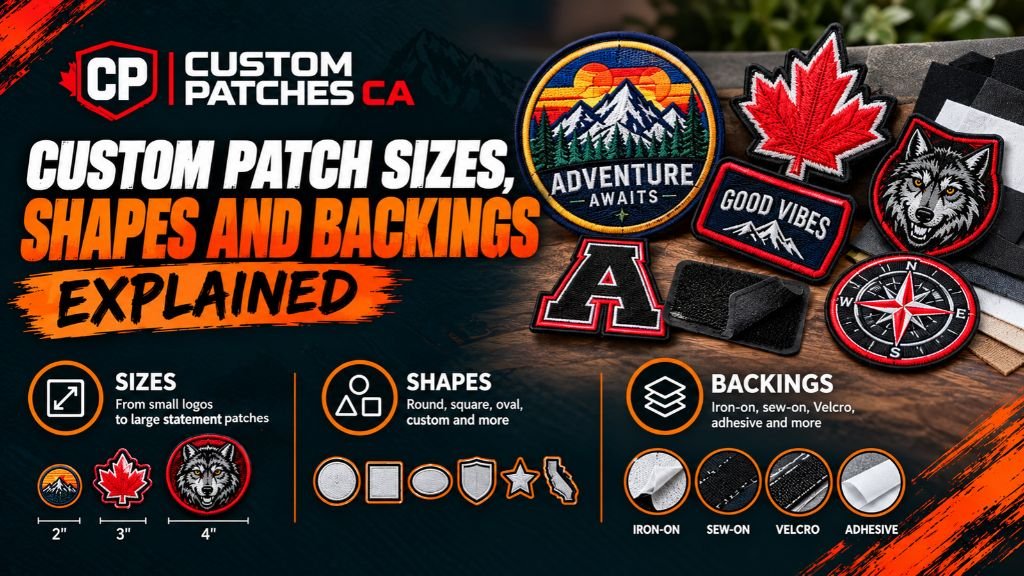
You’ve finished the artwork, and it looks great on screen. Then you picture it on a real jacket or cap, and things get tricky. The logo may be too wide for the front panel, the thin outline may vanish once stitched, or the backing may not suit the fabric. Most patch order trouble comes down to three choices. This guide explains custom patch sizes, shapes, and backings in turn, so you know what to check before you place an order.
Common Custom Patch Sizes and Where to Use Them
So, what size should a custom patch be? It depends on the garment, the artwork, and how far away the viewer will be. A name patch gets read from a few feet away, while a jacket back gets seen from across a room. There are no standard patch sizes that every maker follows. But the ranges below are common starting points.
| Patch size | Example applications |
| 2 to 2.5 inches | Small cap logos, compact emblems |
| 3 to 4 inches | Chest logos, name patches, sleeve designs |
| 4 to 5 inches | Larger uniform insignia, backpack designs |
| 6 to 10+ inches | Jacket-back artwork and large statement designs |
Available space comes first. A 3-inch patch looks fine on a chest but can swallow a small cap panel. Text length comes next, since every extra letter needs room and tiny words blur quickly. Viewing distance is the last piece. Close-up patches can be smaller, and patches meant to be spotted from afar should be larger. Custom patch sizes directly affect how readable your design ends up.
Size and fine details can also change the price. So look at how much custom patches cost in Canada before you lock in your dimensions.
How to Measure Custom Patches Correctly
Wrong measurements are an easy mistake to make and an easy one to avoid. When you request a quote, give the size in inches and say what you measured.
- Measure the widest and tallest points of the design.
- For round patches, give the diameter.
- For odd shapes, share the maximum width and maximum height.
- Ask whether the quoted size includes the outer border.
That last point catches people out, because even a quarter-inch border changes the space left for text and artwork. For a shield that is 3 inches wide at the top and 4 inches tall to the bottom point, write 3 x 4 inches. Printing your artwork at real size and holding it against the garment helps too.
Popular Custom Patch Shapes and Their Uses
The right custom patch shapes depend on what your artwork needs to show.
- Circle suits team emblems, club logos and small badges.
- Rectangle or square suits name patches, workwear branding and text-heavy designs.
- Shield or crest suits uniform insignia, associations and formal emblems.
- Oval suits names, wide logos and long, narrow artwork.
- Custom-cut suits mascots, distinctive brand marks and artwork whose edge follows its shape.
Can custom patches be made in any shape? Often they can, but very thin cutouts, sharp inner corners, and tiny gaps are hard to stitch cleanly. A custom outline earns its place when the silhouette is part of the brand, like a mascot with an unusual head shape. For mostly text or a simple logo, a basic shape leaves more usable space and keeps words readable. A plain rectangle with a clear logo often beats a fancy cut with cramped details.
If you’re still weighing design against patch type, this breakdown of how different custom patch types suit different designs makes a good next read.
Which Patch Backing Should You Choose?
Choosing the right custom patch backing comes down to how the patch will be attached and used day to day. The same patch can behave very differently after a few washes with another backing.
So, what are the different types of patch backings? These are the four most common patch backing types.
| Backing type | Best suited to |
| Sew-on | Long-term attachment to jackets, bags and uniforms |
| Iron-on | Suitable fabrics where heat application is safe |
| Hook-and-loop | Removable patches on compatible surfaces |
| Adhesive | Temporary or short-term use, depending on the product |
Heat-sensitive fabrics, like some thin nylon jackets, may not handle iron-on well. Frequent washing can wear down adhesive and sometimes iron-on. If a patch will come off and go back on often, hook-and-loop makes sense, though the garment needs a matching surface for it to grip. Iron-on patches may need a few stitches around the edge on heavy-use items such as work jackets or backpacks. The heat seal is only a good start. For a lasting hold, sew-on is usually the safest pick.
How Size, Shape and Backing Work Together
These three choices depend on each other, so changing one often means tweaking the others.
A small round cap logo must fit the front panel and suit the cap fabric. Caps are curved and stiff, so a slightly oversized patch can lift at the edges and peel.
A large shield for a jacket back usually calls for sew-on if it should stay for good. If the wearer swaps patches now and then, hook-and-loop can work on a jacket with a surface that grips properly.
A detailed custom-cut emblem needs breathing room around its outline. The border and the attachment method take up space too, so the design may need to be a little larger than you first planned.
Settle the full specification of size, shape, and backing before you approve the artwork.
Choosing Patch Specifications for Multiple Garments or Teams
Ordering for one jacket is easy. Ordering for a whole team or staff list is where things go sideways.
Decide whether one patch size works on every garment. A 4-inch patch that looks neat on a large jacket can look huge on a small one, so check placement on your smallest garment first. Then confirm the same backing works on every fabric in the group, since a polo, a fleece, and a canvas apron don’t take iron-on the same way.
Keep dimensions and attachment needs the same across the order. That keeps everyone looking tidy and makes reordering simpler. Before one big batch, hold a paper copy of the patch against the chest area of the smallest and largest shirt. A couple of minutes of checking can save an entire batch from being the wrong fit.
What to Confirm Before Ordering Custom Patches
Before you send an order, run through this list.
- Final width and height in inches
- Shape and outer border
- Artwork readability at actual size
- Backing type and the surface it will be attached to
- Fabric type and how the item will be used
- Any special needs for removable patches or different garment types
- Final artwork proof and order quantity
Going over these points with your patch maker before production cuts down on avoidable design changes. For the full process from artwork to delivery, see our step-by-step guide to ordering custom patches.
Get the Right Specifications for Your Custom Patches
CustomPatchesca is a custom patch maker for Canadian customers. If you want custom patches Canada, we help with custom designs, patch styles, and personalization options, and we coordinate your order from artwork approval through to shipping across Canada. Still working out custom patch sizes or comparing shapes and backings? Send us your artwork, where you want the patch to go, and how you plan to attach it. When you’re ready, contact us, and we’ll go through the details with you.
FAQs
1. What are the common sizes of patches?
Patches usually run from 2 to 10 inches. Cap logos sit around 2 to 2.5 inches, name and chest patches at 3 to 4, and uniform badges at 4 to 5.
2. What size should a back patch be?
Go for 6 to 10 inches or bigger. Hold a paper copy against the jacket first, since the panel and how far people stand will decide what looks right.
3. What is the backing on patches called?
It’s just called patch backing. You’ll see sew-on, iron-on, hook-and-loop and adhesive options.
4. Which patch backing lasts longest on jackets and bags?
Sew-on holds up best. Iron-on can start lifting on work jackets and backpacks.
5. Can I use one patch size for a whole team or staff order in Canada?
Usually, yes. A 4-inch patch that suits a large jacket can look huge on a small one, so test your smallest shirt first.
